This Is Everything You Need To Know About Enamel Dials – Part 2

March 13, 2019


In Part 1, we explored how enamel is used for making dials, some of the challenges of working with this material, and the different types of enamel available. In the second instalment of our two-part series we turn the focus onto the enamelling process. We will mainly be looking at the grand feu enamelling technique practised by anOrdain.

First though, lets briefly cover enamel dialling techniques from a broader perspective.


Enamel Dialling Techniques

The term ‘enamel dial’ can mean more than one thing. Enamel has been around for a lot longer than watches, and by the 17th century several enamelling techniques were in existence. Of these, there were a few main styles that were applied to enamel dials:

Champlevé - defines a decorative pattern by carving sections out of a thick metal base plate. The cavities are then filled with different coloured enamels.

Cloisonné - defines the outline of a pattern using thin strips of metal (usually gold) on an enamel base. Layers of different coloured enamels are then built up in the cells.

Flinqué - starts off by first patterning the metal base plate, either by engraving or guilloché. Transparent enamels are then used to cover the metal, so that the patterning remains visible. 

Miniature painting on enamel - an enamel surface provides the miniature canvas, onto which enamel mixed with oil is used to make a miniature painting.


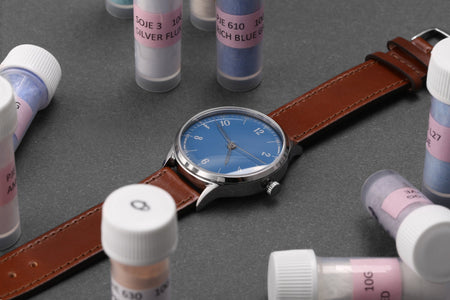
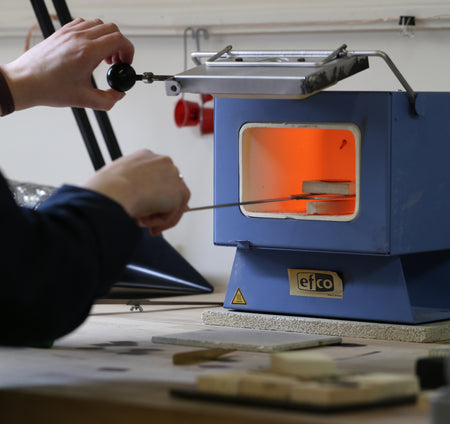
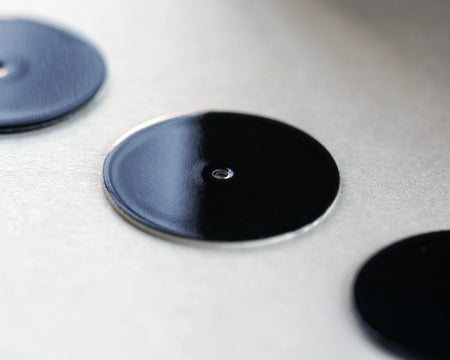
Other enamel dialling techniques also exist. Paillonné for instance (where gold leaf is sandwiched between layers of transparent enamel). And grisaille (which uses only black and white enamels). The quintessential enamel dial though - as offered on the anOrdain Model 1 - is created by a process known as ‘grand feu’. The literal translation of which is ‘big fire’, as the core component is firing in an oven. (The British term for this technique is vitreous enamel.)

Unlike the styles mentioned above - which incorporate decorative ornamentation or painting – the focus of the grand feu technique is on highlighting enamel’s own innate beauty. The dial is completely covered by an uninterrupted lake of enamel, the surface of which is as still, deep and sheeny as glass. Sounds simple enough. In reality, achieving the desired finish is an arduous and punishing process, requiring a high-level of expertise and even more patience.


Taming The Flame

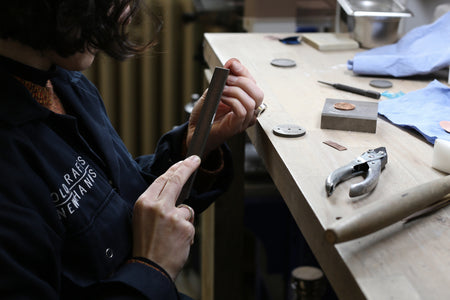
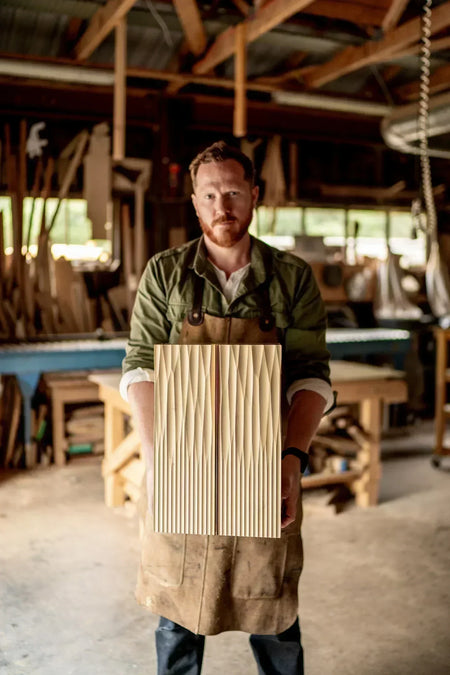
In starting anOrdain, the allure to make enamel dials was irresistible. Enamel produces an incomparable depth of colour, which doesn’t fade over time. Moreover, enamel dialling demands a very hands-on at the workshop bench approach (which is a core part of our philosophy). That said, learning and mastering one of watchmaking’s great arts was no walk in the park. The steps involved in the fabrication of enamel dials are quite straight forward. However, the quality of finish required to be acceptable for use in a watch leaves no margin for error.

At the beginning we were complete novices. There’s no readily available place to go to receive instruction in enamel dialling in the UK. Instead, it took us almost 4,000 hours over three years at the bench to perfect our first enamel dial. The payoff has been in developing our own enamel methods and hence enamel dials that are unique to anOrdain. While we broadly follow the grand feu technique, our practices differ to those of other grand feu enamellists - read more here. Our style focuses on the rendering of colour which enamelling enables, and the depth of that colour.


The Grand Feu (Vitreous) Enamel Dialling Technique

To make a dial in this fashion begins with a wafer-thin copper disc, cut out by hand and prepared for enamelling. (Gold, silver or various alloys can also be used for the base plate, however, in each case the enamel may behave differently.) Small feet are soldered to the underside, which will eventually fasten the dial to the movement. So that the powdered enamel doesn’t fly off when the dials are moved, a coating of gum is applied prior to beginning the enamelling process.

Sally preparing a wafer thin dial blank for enamelling.


In the majority of the techniques described above the enamel powder is first mixed with water and applied with a brush. Grand feu can also be done this way. However, more often the powder is sieved (like in cake making) over the base plate, forming an even layer across its entire surface. At the beginning, both sides of the base plate receive a layer of enamel. Known as ‘contre émaillage’ (counter enamelling), this crucial step is done to prevent the metal from warping. (Due to the stress induced from firing multiple layers of enamel on the topside.)

From here, the dial is placed into the oven for firing at temperatures upwards of 800℃. This needs to be carefully controlled - too hot and the metal base plate will melt. The kiln also needs to be kept spotless to avoid debris contaminating the dial. Firing only takes a few minutes at the most. Our enamellists must be vigilant with firing times depending on the particular enamel, as well as which layer they’re up to. The powdered enamel melts and flows into a smooth consistency. After every firing the dial is always examined for defects (and possible rejection).


Morna removing a molten dial from the oven.


Once cooled, the enamel is sanded flat by hand, and then the process is repeated (up to eight times). The initial layer forms a foundation. It lacks the colour and lustre obtainable at this early stage. But the combination of firing and sanding in layers gradually draws out the best colour and sheen from the enamel. (Different colours require more or less layers to reach this optimal state.) A successful dial is one that makes it through all our checks up to the final layer. The edges and centre hole are then cleaned up (for any oxidation), and it’s ready for printing.

We hope you’ve enjoyed this two-part exposé on enamel and enamel dialling. To view the finished product, please click on the ‘Watches’ link in the top navigation bar.